How Did You Use New Media Technologies In The Construction & Research, Planning & Evaluation Stages?
Final Cut
|
Final Cut is the editing software which we used to make all of our videos. In our course these video can range from audience interviews, to the trailer and even the screen casting videos on this page. We use Final Cut on Mac Operating system as the graphical user interface is very easy to use and the tools available to use are efficient to make our videos. Overall in this video I have screencast a basic understanding of Final Cut and shown some of the tools which have been used to create my overall finished products (videos).
|
|
|
|
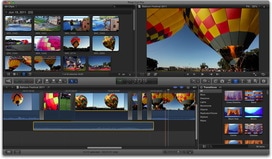
The first tool that I have demonstrated within my video is how to import clips. For the purpose of this tutorial video the clip I have taken is from YouTube. An alternative method would be to insert different memory units such as a SD Card and extract the clip you need from there. These are done in a similar fashion when you click the import button. Overall to take a video from YouTube you must take the URL. When copied you must paste the URL into a external converting website. For this video I have used the website: http://convert2mp3.net/en/. When pasted into the website you must choose the file format that is wanted. In the case for a video clip with sound I have selected the mp4. This will display the image and sound clearly compared to other file formats. When the conversion button is clicked it will start the process and then you are able to save it to your hard drive (or other storage devices). To insert the clip into Final Cut you must either drag the file into the clip area like I have done in the video or insert it by selecting the option in Final Cut which I have also shown. When all the clips that the user wants are in Final Cut it is time to start editing.
|
|
In my video I have based all of the screencast of the main editing that you are able to do to the singular clip, however you are able to have multiple clips in your timeline at once. To get clips on your timeline you need to drag them into the position where they are wanted. You are able to place them before or after clips that are already on your timeline to make the sequence you want. Another tool that you are able to use is selecting different parts of a clip. There are two ways of doing this. Firstly, you can drag the mouse over the section of the clip that is wanted. To enable you to get a more precise selection press 'cmd i' to start, 'cmd o' to end and then enter the clip into the timeline by pressing 'cmd e'. An alternative way of making your clips the correct size is to use the blade tool. Overall when they are the correct size you can start the main editing change what the size look like and adding different effects.
|
|
|
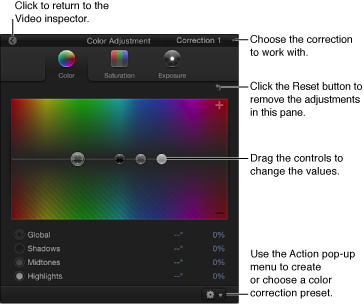
The first effect which I have shown how to do is colour correct. In my trailer this was very important as it can be used to make clips darker. Overall this allowed me to create a more sinister atmosphere for the audience. Colour correct has three main different section that allows you to customise. These three sections are colour, saturation or exposure. Colour allows you to change the colour of different parts in the clips. As you are able to see in the video when adjusting this it can sometimes look like a tinted effect has been added. Saturation allows you to change how strong the colours in the clips are. This means that you are able to have stronger red or duller blues. This can be used to highlight different aspects in the video such as blood. Finally, exposure allows you to control how light the clip is. For example in this section you are able to reduce highlights and increase the shadowed area which will allow a darker clip which we be good for a horror scene.
|
|
The next editing technique that I have shown the user what to do is use the margin yellow lines. These can be accessed through the drop arrow in the top right of the preview screen. When accessed yellow lines will appear in rectangular shapes. These will show what other devices would see. This means that if you were watching the video on a computer you would be able to see the whole frame, however viewing it on a phone platform would limit the area you are able to view. The area would be limited to the far in yellow lined box. Overall these tools can be helpful for displaying key information such as text so that each platform is able to see it.
|
|
|
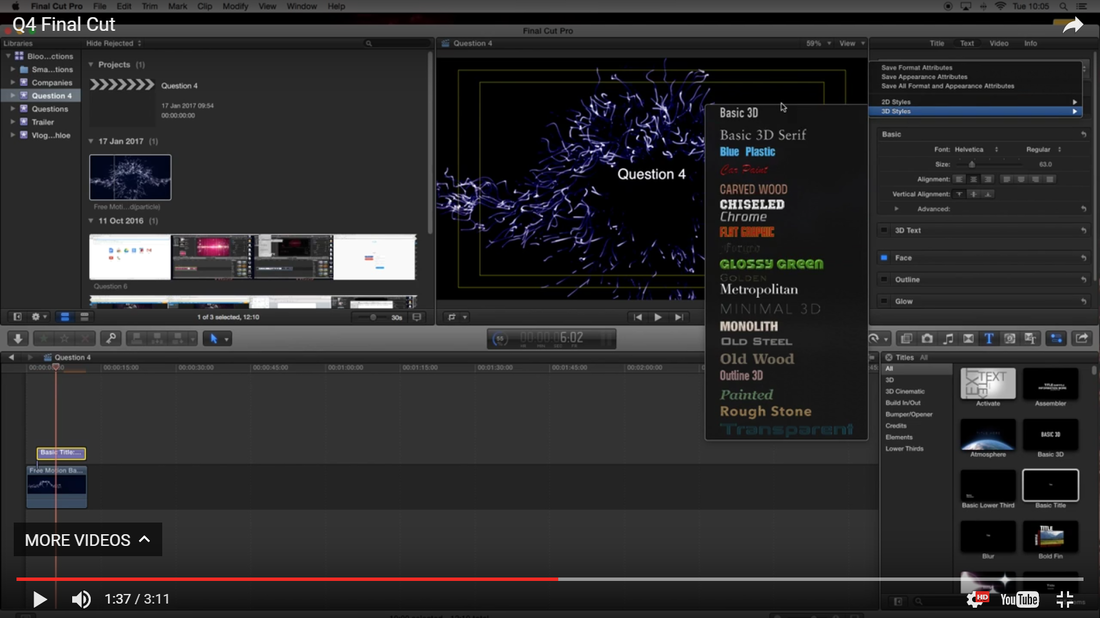
Text was also the next skill that I showed in my video. I made sure to view the previous skill of the yellow lines to position my text so that each platform was able to see it. Overall text can be dragged on the timeline from the tools in the bottom right hand corner in the 'T' icon selection list. When dragged onto the timeline text will be displayed in a purple box so that it can easily be recognised. To allow text to be see over the videos you must make sure that it is positioned above the clip. There are many different edits that you are able to do to your text. Firstly, you are able to type into the text box what you want it to say. Secondly, you are able to change the style of how the text is view. There are 2D and 3D set designs that you are able to choose from. As well as the set designs you are able to edit the colours and font manually. Other edits that you are able to do to text is changing the size, changing the opacity and changing the position such as where it is displayed and the rotation on the screen.
|
|
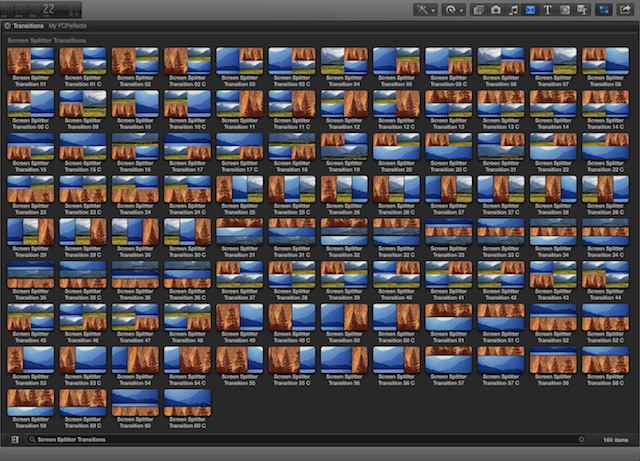
Transitions are the next edit technique that I have shown. There are multiple ways of adding a transition to your timeline. The first way of doing this is dragging them in from the bottom right hand corner of the software under a different icon selection. There are many different ones to choose from such as fade, arrows and bloom. All of these will fit into between different clips and create an effect that will bind them together in the way in which the user wants. Another way in which you are able to add a simple fade effect is using a command tool. This is the technique that I showed within the video above and it allows quicker and more efficient editing. To you this you need to clip on a clip or on the side of the clip where you want there to be an transition. You them use the key shortcut of 'cmd t'. This will then insert the transition in the place you have selected. In the trailer I mostly used this effect when inserting text but did not use it within the clips as it would reduce the speed and tension.
|
|
|
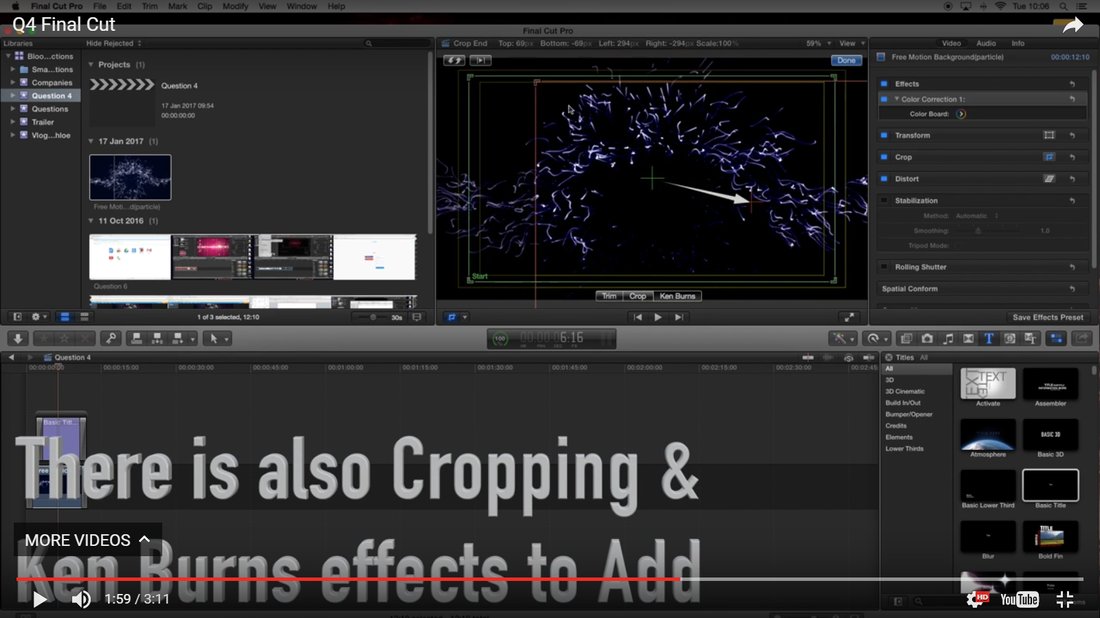
The next technique you are able to use on your clips are transform effects. Firstly, selecting the video you are able to make it smaller so that you are able to fit multiple clips on the single screen. I used this last year in Evaluation Question 7 to display my Preliminary Task, Trailer and my Interview at once for the user to compare. Other basic effects you are able to use are trim and crop. These allow you to make your video smaller and remove section that you do not need. Finally, you are able to use KenBurns effects. These allow you to select clips or image and pick a start and finish point. This will allow you to move across your clip, zoom into your clip and zoom out of your clip.
|
|
The next editing technique that you are able to use is adding sound to your timeline. This allows the video that you create to have more sound and has allowed me to create a sinister atmosphere in my trailer. Overall to get a sound you can either record it in a clip, upload the clip and detached the audio. To do this you will right click on the clip and then click the detach audio button. The alternative way of getting some music and the way I used within the video in from YouTube. Then using the same clip converting website as converting the video you are able to download a file of the sound. Make sure instead of selecting mp4 file type you select mp3. This will ensure that you only have sound rather than a video as well. Then insert it and select how much of the sound clip you want the same as you would do with a clip. A sound clip will be displayed in green and can be positioned above or below the video clips as it will not effect them. You are able to change the volume by dragging the main line up and down. You will see the change by how high the volume lines are below the main line that you have dragged. When you increase the volume the lines will change to amber and then red. This is to indicate that it may be too loud for some users.
|
|
Finally, as I have some in the end of the video there are many more tools of this piece of software that you have access to which are each able to allow the user to create the best video and effects possible.
Using this software and all of techniques and effects available it how allowed me to create a good trailer and evaluation videos. It has allowed me to edit clips to be darker with has given me a better atmosphere for my video. This has also allowed me to place clips in order and lay sound over the top. This help with the voice overs in the trailer. Text also helped within my trailer to do the title screen and text has also been displayed in these videos above to help me create a more detail tutorial to tell the user what I am doing rather than just showing them.
Weebly
|
Weebly is an online website making tool which the creator has complete access over. They are able to edit their site with a Weebly domain for free just like this one. These websites are also able to get a World Wide domain such as '.com' with a small price and you are able to get premium features. This video is to show user a little on how to use the free packaging of the online tool. Firstly, an email is needed to create an account. You access your website on the main Weebly page using the email account that owns it and the passcode that you have selected. When logged into your account you will get to a Weebly website homepage. This will show you how many view your account has and how many visitors are unique. This will allow you to evaluate the popularity of your site and see if people like what it is made for such as product releasing (business use). Also on this page there are upgrade posts and new letters about Weebly, encouraging user to be connected and invest in the company. The other options on this page are to edit account details, edit your website and delete your website. You are able able to have multiple websites on the same account, however in the free package you are only allowed one with a maximum of 15 pages. When editing your website all of the tools are easily laid out across the screen. At the top there are different options such as build, page and theme to allow the user to select what the user wants editing.
|

|

|
Firstly, the theme button allows you to select the theme for the website that will change certain parts of each of the pages. One of the effects of selecting a theme will be the overall colour. For this website I have selected a black and white theme which makes the borders of the page black and the main page white. Another feature that the theme adds to the website is a layout. I have selected a theme with a header in. Here we have inserted the image of the eye that is Bloodshot giving an imagery of Bloodshot Productions. Then in the header of each page I have made sure that there is a title so on each page there is a clear title of what it is about.
|
|
Secondly, pages are set up through the page button. You are able to add pages in giving them a name to recognize them by and also a basic layout such as giving it a header. Also from this option you are able to delete the pages and move them around to position them where they are wanted. If you place a page under another and then move it across to the right it will create a drop down menu. This is what I have done under all of my main options such as planning and research.
|
|
|
|
Thirdly, the build option is the biggest feature of this site allowing you to customize what is on each page. All of the options that you are able to select are on the left hand side. The first main option that I showed in my video was adding text. There are two types of text you are able to add which are title and then text. The title are generally bigger and bolder than normal text. You also have the options to customer the text such as changing the font, size and color to match the style of your website. Just like I explained in the video you are also able to add different multimedia features so as well as just text you are able to have images and video. You can drag or insert image in from your hard drive and for videos you can upload the files or take the URL from YouTube. To do this all you need to do is copy and paste the link into the option box when you click on the video button. There are also other useful tools that you are able to add such as documents to show off more technological skills such as Microsoft Word or PowerPoint. Lastly, to lay out your page even better there are other tools that I use lots such as dividers and spacers. These will be able to split up videos from text and overall make your website look more professional.
|
|
Finally, in the top right had corner there will be a button that says 'publish'. This will save all of the changes that you had done to your site and then upload it to the World Wide Web for people to access.
|
|
Using all of these different techniques has allowed me to create a highly professional website for Bloodshot Productions. It allowed me to simply layout pages that can be listed and easily displayed what they are about helping visitors know. This website tool has also helped me insert the video such as my trailer and the videos above. These allow me to create a more multimedia piece of work and allows me to display more BloodShot Productions content. Finally it also allows more multimedia techniques such as images to be displayed. This has allowed me to place magazine covers and poster of my trailer onto the homepage of the website to use for advertisement and show more content that we have created.
Photoshop
|
Photoshop is a piece of software that is used to edit different photos. This software allowed us to create advertisement for our trailer such as the poster and the magazine cover. Using the many different techniques we were able to make them both look professional and put across our film. First of all you need to select the size of the document you want. You are able to customize the size changing the height and width of your page or you are able to select a basic measurement of documents such as A4. These allow you to save or print the documents in the size selected. The only issue with choosing the size of your document can be the size of your photo. If the photo is small with little pixels and you try and stretch it onto your document then it will be poorly displayed. This is because the pixels would have expended and can create a blurred effect, losing the precision of your photo and decrease the effectiveness of your advertisement.
|
|
|
|
Opening images are very simple in this piece of software. You need to click on the menus in the top left and go through your files until you reach the picture wanted. Then you need to open it and it will be displayed as a page. Here you are able to start working on the picture or if you need it a certain size you are able to select it and drag it on to the document wanted. In Photoshop you are able to open as many file as you like at once. This means that you could potentially have ten pictures open and then transfer them all onto a single document. This allows easy designs for elements of my advertisement such as the magazine.
|
|
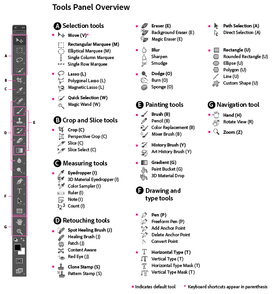
The graphical user interface of Photoshop can be changed in many different ways to suit the needs of the user. As I have shown in the video you are able to choose from a range of full screen modes to still being able to see the computer's desktop. Overall when editing a single image it is worth making sure that the software is in full screen mode. This will limit the distractions from icons or other pictures in the background. Alternatively you should not go full screen if you are adding more images onto your document as when full screen only a single file can be viewed at once. Other displays you are able to change within the software are some of the tool of the left hand side. For example you are able to activate the history button which will bring up another menu. This will allow you to remove back several steps rather than using commands such as 'cmd z'.
|
|
|
|
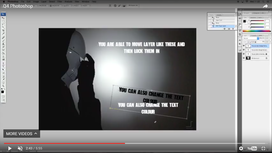
Text is another important tool when it comes to Photoshop and making different multimedia documents. My poster and magazine both included text which I put on using this software. To insert text you must select the option that will appear in the left hand side of the screen. The icon that you click will be 'T'. When select you must drag over the area of your document where you want the text to be included. After it is selected you are then able to type the message you want to be displayed. There are also many different changes you are able to make to your text. The first change would be the font. In the top menu on the left hand side it will display your current font. Bare in mind if you have already written your message and want to change any options to it such as font, size or color you must highlight it first. When you see your current font there will be an drop down arrow next to it. When clicked many new font option will appear for the user to choose from. This is the same with changing the size of the text. The menu for this is slightly to the left of the font selection menu. Like the font selection menu there is a drop down arrow with default sizes but you are able able to highlight the size and type in your own size using your keyboard. This will allow more precise text and can allow bigger text. An example of where this was used was making my poster. The maximum size that you are able to select is 72. For my title I wanted the size of 125 so I inputted the command using the peripherals I had access to. Another elements to bare in mind is that when increasing the size of your text you may also need to increase the size of the text box or some of the writing may be cut off or displayed blow the area where it is wanted. The last technique of text is that you are able to change the color. This can be down by adjusting the meters of strength in different areas like I have shown in the video on the top right hand side of the software or using the selection tool. Each of these will allow the user to get the color that is required and will allow their message to stick out from the background or blend in depending upon what effect they want to give across. Having this tool is very helpful and you are also able to add other effective techniques such as overlaying the text layers to add shadow effects which will make it look more professional.
|
|
In the bottom right hand side of the software all of the layers that have been placed onto your document such as images and text will be displayed. There are many different elements that you are able to change from accessing them. One technique you can use is dragging them up and own. This will place them in order. For example, the higher up you drag a layer, the higher in the document it will be displayed. This means that it will be above the layer below it in the order. Other tools that you are able to use in this section are opacity and lock. You are able to change the opacity of each layer so that it look like object are faded over the top. You are also able to click on the eye next to each layer. When clicked the later will disappear on your document. When clicked again it will reappear. Using this will allow you to focus on other layer without letting some of the object get in the way. The last tool that I have shown is the lock tool. When a layer is selected you are able to click on the little padlock icon. This will lock in the layer. This means that you will not be able to move or edit it. This can be helpful when you know that certain layers are complete and in the correct place on the document. This can be a starting point to the layout and help you work around it. I did this with my poster. After the main background image I placed my title. I knew that I wanted to keep the title in the place I had selected so I locked it in and then edited the other layers around it.
|
|
|
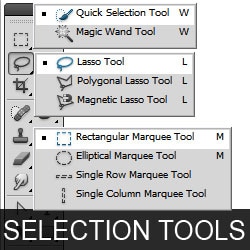
In the video above I have also shown bits of a selection tool that I have mentioned before. This allowed you to select different parts of a layer and then copy it. You are then able to duplicate the layer or paste/drag it onto a new document to use it. There are two main selection tools which I have used. One is the quick selection tool which you will drag quickly round and object and the other is the magic wand tool that will be more precise when clicking over the layer. Other tools that you are use are lasso but these are less accurate as are self draw. If you have selected a bit more of the layer that you want you are able to use the remove background tool and rub the bits you do not need out. This will give your image more sharpness and effect. An example where I used this was on my magazine where I placed the image of me onto the main document.
|
|
Another tool that you are able to use is the transition effect. When selecting layers you are able to move the easily around the document. In the corners and side you are also easily able to increase or decrease the size of the overall shape. Another tool that can be useful is if you hold the mouse above one of the corner you are able to rotate the shape. I have used this in the video above to create a shadow effect that was titled from the main piece of text.
|
|
|
|
The last main part that I have shown in my video is getting the special font for my poster credentials. To do this I went to http://www.dafont.com/, a website called DaFont. Here I search for and downloaded the font called Universal Accreditation. To make sure that Photoshop was able to access the file you need to click the install font button and then close the software. When you reload the software it will then be accessible from the font drop down menu. To type out standard words using this font you must type in capitals or it will come up with special titles. To get some of the special title you will also need to use special keys. An example of this would be 'alt u' and 'shift a' which makes 'Presents A' as a special title. All of these were used to create the credential;s on my poster and make it look professional, recognizing the main producers that made the film.
|
|
Finally, there are many other tools that are available to use in the software which will help you edit different images and create great multimedia techniques. Examples of these other tools could be the fill tool allowing you to create solid colors, the zoom tool allowing you to focus on detail and the crop tool allowing you to remove parts of the image that are unneeded.
|
|
Using this software and all of the different techniques that era included within it I was able to create two great pieces of multimedia work that allowed me to advertise the film that my company was making. The text could be easily added to the poster and special fonts allowed me to make sure that all of the correct credentials were in place. The magazine could also easily be created using this software as I was able to drag multiple images on to the single documents such as the picture of me and the picture of the bar-code. I could also easily get the correct font for the Total Film title. Finally, I was also easily able to add the solid shapes to create the strip going across the front cover showing other horror film that are being released.
QuickTime Player

QuickTime Player was the software which I used to create these videos above. It is a simple to use software that allow the user to complete different clips. You are able to screen record, audio record or do both at the same time. As suggested screen recording the user will be able to record the screen, audio recording will be able to capture the sounds of the person (microphone must be included) and both allows the recording of the screen and capture of the audio. Screen recording I used in the video above. I went through simple techniques and displayed different processes which could be done on the website and pieces of software which I used. Overall this was used to show the user how to complete the actions and then with the Final Cut software I was able to later edit the video putting sound and text over the top of my screen casting. This is easy and simple to do as when the screen recording is complete it creates a file which you are able to save and then upload into the software. I also used this software for getting some audio pieces in my trailer. This allowed me to have a person speak into the built in microphone on the Mac and then save the clip. This clip in my trailer was later used as voice over to create a more in-depth atmosphere and make the audience feel as if the kill is talking directly to you. Screen and audio recording would capture both. Although I did not use this it would have been good to use for explaining my video above. This technique was not used due to the fact that I complete the screen recording in class and sound from the environment around me was being picked up by the microphone.
To conclude QuickTime Player is an easily accessible software on Mac that can be used to show people what a user is completing on screen. It is good for making tutorials and can also be used to capture sound clips. This makes its easy to create different clips that can later be used for editing in a software such as Final Cut.
To conclude QuickTime Player is an easily accessible software on Mac that can be used to show people what a user is completing on screen. It is good for making tutorials and can also be used to capture sound clips. This makes its easy to create different clips that can later be used for editing in a software such as Final Cut.
-BH
